Tuesday, December 31, 2013

Family Friendly 2014 Celebrations

Photo Credit HERE

Some of you may be like me: the days of staying up until midnight at some party or celebration are long gone. Replacing party outfits are comfy PJs. Instead of a fancy dinner we'll stay in and eat homemade/frozen appetizers and pizza. Dancing with my current crush is replaced with dancing with Mr. Right and the two kiddos. And the party music will most definitely be kid friendly. 

 With two young children who just celebrated a pretty big holiday last week, I don't want to do anything too spendy or over the top. We won't have anyone coming over so it will be just the four of us. But this doesn't mean that New Years Eve can't be memorable or fun.

I took this week off from designing anything new, so these ideas are not mine. I love this person's approach to a fun, family friendly New Year's Eve. The ideas are simple and perfect for my kids. You can find her New Year's Eve party plan HERE. She also links over to another website where you can download a PDF for a "Year in Review" Page for each member of your family to fill out.

Midnight may come at 9pm for us, but you can be sure we'll be making memories and hopefully some new traditions too.

Tuesday, December 10, 2013

PeaBeeDesigns Winter Giveaway: 3 Winners!

Here's your chance to win an adorable coin purse/wristlet. It has room for cards, your cash, and even your phone! A great option for when you want to go out without a bulky purse. But what fun is a wallet if it doesn't come filled? This one comes with a $10 itunes gift card and a coupon for 30% off a future purchase at PeaBee Designs. To enter" like the peabeedesigns facebook page and then make sure to find this picture and like, comment, and share. THREE lucky winners will be announced Friday December 13th. 
Merry Christmas from PeaBeeDesigns!

Monday, December 2, 2013

Christmas Printable Round-Up

I may have outdone myself this year with Christmas printables, but I couldn't help myself.  There are so many fun sayings that I wanted to turn into prints, so instead of choosing one to feature this month, I decided to feature them all! 

Remember these can be printed in a variety of sizes and have tons of possibilities. Frame them to put in your home, print smaller versions for cards on treat plates or as part of your neighbor/teacher gifts. And please like, share, and pin this post so others can enjoy it as well! Merry Christmas!


To download the Christmas subway art, click HERE
To get the buddy the elf quote, click HERE
For the chalkboard print, click HERE

Hope you all have a wonderful holiday season! I have some fun things planned for 2014 and can't wait to share them with all of you!

Sunday, November 24, 2013

Easy 3D Paper Snowflakes

I recently went to an activity where someone taught me how to make these fun and easy 3D paper snowflakes. They look so cool when finished and you can make them in any color. I can't wait to make some using some fun, Christmas themed, 12x12 scrapbook paper!

Materials needed
6 sheets of paper (any color, or some of each color for a 2-tone snowflake)
a glue gun
scissors
optional: stapler

Step 1: Fold your paper so it will make a square. Cut off the extra rectangle piece at the bottom.
 Step Two: Keep your square folded in a triangle shape. Fold again into a smaller triangle.
 Step Three: Cut 3 lines into your triangle. Cut from the folded side toward the open side, stop cutting about a half inch from the opening. Don't worry if your lines aren't straight or your sections aren't perfectly spaced. You'll never be able to tell once it's finished.
 Step Four: Open your triangle.
 Step Five: Starting with the middle pieces, use hot glue to secure the two sides together.
 Step Six: Flip your paper over. Use hot glue to secure the next two sides together. Keep flipping back and forth until all the sides have been glued.
 This is what one looks like when it's finished. Repeat steps for your other pieces of paper until you have six pieces that look like this.
 When you have all six pieces glued, it's time to assemble your snowflake. Instead of thinking each piece goes side by side, you actually will lay each piece on top of each other. Match the points up at the bottom. You can hot glue them together or you can staple them (I like to staple because it helps make them sturdier). Keep laying pieces on top of each other, matching the points at the bottom up, until you've secured all six.
 You will also need to glue or staple the pieces on the sides where they touch. This also helps reinforce them so it stays together.

The finished product:

This is a fun craft for kids and adults alike. You can make tons of different sizes on plain or printed paper.

And if you need a video tutorial for these, I liked this one HERE. Enjoy!

Wednesday, November 13, 2013

PeaBeeDesigns on Groopdealz

Have you been over to the groopdealz website yet? I'm addicted to buying everything from jewelry to clothing to kids stuff on there. The deals change daily and often you've got to be quick because some things sell out fast!

I'm really excited to announce that my monthly milestone stickers are being featured on their website right now! Yes, now! So spread the word and go over and check them out. There are only limited quanities of each design, so don't delay!

Here's the link to the site and my listing.
https://www.groopdealz.com/deal/monthly-milestone-stickers-set-of-12/8457

Friday, November 1, 2013

November Freebie: The Forgotten Holiday

Well, Halloween is over so let's jump right into Christmas, shall we? Just kidding! In my opinion, Thanksgiving shouldn't be overlooked. Although if you look in the stores and turn on your radio, it's quickly becoming the forgotten holiday. Poor Thanksgiving. It feels sad. Not anymore! This wonderful holiday full of good food, family, and no gift expectations is the focus of this month's freebie. I LOVE subway art (if you haven't noticed hee-hee). It's so easy to pop it in a frame to add just the right touch to your holiday decor. Put it on a mantel or shelf, or even as part of your table centerpiece. Print smaller versions for place settings, to make dinner invitations or to attach to pies or food you're bringing to a holiday gathering as a gift for the host. So many possibilities--that's why I love it!


To download this print, click HERE

Oh-Kay...for those of you wanting to get a jump start on the other holiday coming up (the holiday that shall not be named on this blog until AFTER Thanksgiving), go HERE to make an easy and fun advent calendar.

Don't forget to pin, share, and like these! Spreading the word about my little shop and the freebie printables is the best way to show your appreciation for what I do (or try to do). 

I also have some spots open for holiday cards. So if you're like me and like to get your cards done early, don't wait to order your custom cards designed by yours truly. I have tons of fun backgrounds, fonts, and layouts. I'm working on one right now that has 6 pictures on it as well as room for a subway style word art with your favorite memories from 2013. It looks AWESOME and will end up being way cheaper to print than ordering from one of those photo websites.

Monday, October 21, 2013

Confessions of a Wannabe Seamstress: DIY Toy Story Costumes

I like to pretend that I'm crafty. Sit me in front of a computer with a design program and I can whip up something as quick as a hiccup (or as quick as a pop-tart, as one of my middle school students said). Sit me in front of a sewing machine and I have flashbacks from my 7th grade home economics class where I accidently sewed the two legs of the boxer shorts I was making together. That made for several unpleasant days of unpicking the seams. But with pinterest and blogging, there are so many cute sewing projects out there! I keep wishing that I knew how to sew so I could make this stuff for my kids instead of spending money to buy it. 

Fast forward to a month ago when I decided that I wanted my kids to be Jessie and Woody from Toy Story. I researched costumes online and the money they wanted for these cheap little costumes was ridiculous! Finally, I decided to put my money where my mouth is and sew my own costumes.

First, I sought out my materials. Jessie and Woody make great DIY costumes because you probably have most of the materials already. Jessie and Woody both wear blue jeans (check) and I found a white collared shirt for Jessie at the second-hand store for $2. Woody's yellow shirt was a lucky find at Wal-Mart. I saw the yellow shirt (it has a picture on the front) and decided Woody could just wear it inside out and no one would know--plus then he could wear it after Halloween too. I think the shirt was around $4. Then, I bought cheap cowboy/girl hats online from Amazon. A trip to the fabric store and I found the cowprint fabric and fake leather material. I also needed velcro, ribbon, and red glitter glue. I also bought heat-bond hemming tape as a crutch--just in case the sewing got a little too intense for me--but I'm proud to say I didn't have to use it at all!

I bought a half yard of cowprint and a quarter yard of leather (mistake, I ended up needed a bit more), and I think a quarter yard of yellow as well.
I tackled Jessie's outfit first. I used yellow fabric and a pencil to trace the outline of the shirt. Then I used a pair of jeans to trace the cowprint fabric for the chaps.

Using the pencil, I drew a little detail to the bottom so it would look more like a cowgirl shirt. Then scissors to cut along the lines I drew.
 I realized that sewing onto a shirt was going to result in me messing up big time, so I opted to use velcro to secure the yellow piece to the front. I used the red glitter glue to add more western details to the front of the shirt.
 I also didn't think I could sew shirt cuffs onto the sleeves without majorly messing it up, so I made the cuffs with elastic that just slip over the existing shirt. I used white felt for the fringe.
I also added white fringe to the chaps. This is also where I got into my first problem. I didn't have enough fabric to hem the pants properly. So, I did do a quick seam up the sides so they wouldn't completely unraveled, but they do have a rough edge on them. I am just going to say they look more rugged/western that way ;)
 I didn't want to ruin a pair of jeans by permanently attaching a pair of chaps. So I found this idea there you use a piece of the leater to make a belt that just loops through the jeans beltloops, then use velcro to secure it in the front. I will probably add a belt buckle made from cardboard and spraypaint too.

Woody doesn't need as much for his costume (just a vest), but this part took me the longest. I used this pattern/tutorial for the vest. As a non-sewer I stared at the pattern and reread the directions multiple times, not understanding what I was supposed to to (it wasn't the tutorials fault, it was mine!). Apparently, cutting out 3 pieces of fabric was like brain surgery for me. Finally, I just went for it and started cutting and figured it out. Now, the pattern makes complete sense.

The original pattern uses felt for the vest, but Woody's vest is cowprint. I decided to line it with the leather and instead of hemming the cowprint, I folded over the leather to make an edge. It turned out pretty nice, I'd say (don't look to closely at my crooked lines! Also, I didn't buy enough of the leather so that's the back leather in two pieces instead of one like it should be--oh well)


Finally, after a day of sewing, I was done!


And you know what, I actually really liked this project! It was fun. This might not be the last sewing tutorial you see from me!

Friday, October 4, 2013

Halloween Freebie: Oh what a treat!

I love the month of October. I'm ready for the awful heat of summer to simmer down a bit, and I love the changing leaves. I love sweaters, hot chocolate, and reading a good book next to the fire. I also LOVE Halloween. It's been my favorite holiday since I was a kid. (Although, I may think differently after this year. I decided to sew my kids' halloween costumes myself. Aye-yi-yi! What was I thinking?) So, it's no surprise, really, that I centered this month's freebie around it. Enjoy! Remember to like, pin, and share this with all your friends so they don't miss out! My little shop loves when we're shown some love!

 Also, I've started getting orders for custom Christmas cards. I have tons of new backgrounds, fonts, and layouts for this season and can't wait to start using them! Contact me about your custom Christmas card today before I get too full!

Dowload the halloween print by clicking HERE

Have a spook-tacular month!

Monday, September 2, 2013

Fall back in your routine: September Freebie

September is the one year mark of PeaBeeDesigns doing the monthly freebie posts! I hope you've enjoyed them as much as I have enjoyed creating them for you. Please show my little shop some love and help spread the word by liking, sharing, pinning about these freebies!

With back to school, it usually means back to being organized, back to sports, back to homework, and back to a structured life. I recently went back to working full time and needed a chore chart and a way to be organized for my daughter. I found one I liked and it was almost $14.00 (and that was on sale!). My mouse was hovering over the "buy now" button before I had the sense to think "What am I doing?! I can make my own!" So that's what I did. There are six color options, so if you have more than one child, you can download and print each child a different colored chart. I've also included how I made this chart reusable. 

The lines on the left are for everyday chores that you can mark off when complete. The lines on the right are for sports/dance classes or appointments that are weekly. Then there's a friendly reminder that we need some play in our lives too :)

 to get the blue chart click HERE
 to get the green chart, click HERE
 for the orange chart, it's HERE
 for the pink chart, click HERE
 for purple, HERE
and for yellow, click HERE 

To be able to make this a reusable chart, all you need is a printed version of the chart, a plastic sheet protector and a dry erase marker.
 Now all I have to do wipe the chart clean with a damp rag when all the circles are filled up.

Make sure to check out MY SHOP on etsy and be our friend on the peabeedesigns page on Facebook. We love new fans!

Wednesday, August 7, 2013

August is here! You know what that means...

Man, where did the summer go? I can't believe August is here and soon we'll be packing backpacks and heading back to school. I wasn't sure exactly what I wanted to do for this month's freebie printables (I have tons of quotes and ideas filed away for future printables and always lament over which ones to do), but as soon as I saw this saying I knew it was going to make the cut. I love this chevron pattern and think the blue fits perfectly with the relaxed saying. I am going to print a 5x7 and pair it with a white frame to display on my front entry table. These 7 words say it all.
To dowload the "Please Excuse..." printable, click HERE

 Then, I stumbled across this quote by Audrey Hepburn fairly recently. Man, what a classy lady. Love her! I absolutely fell in love with this saying and have decided that this is MY MANTRA in life! Yes, this is what I believe with all my heart and soul! Can't wait to display this where I can see it as a daily reminder.
To dowload the "I Believe" printable, click HERE

If you like these quotes, chances are you'll like seeing us on Facebook! Head over there and like the peabeedesigns page. A little love from fans does wonders for me when I see new likes come across my page! Also, check out what I have new on my etsy shop! It's never too early to start Christmas shopping!

Please remember that these printables, along with all others, are meant for personal use only! Thanks!

Monday, July 1, 2013

July Freebie Printables!

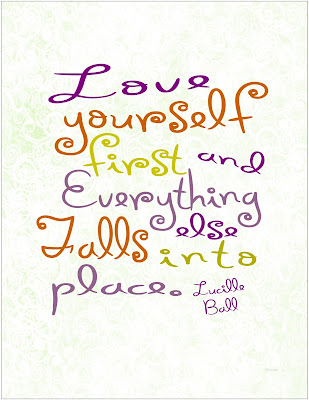
I know I should probably do something 4th of July themed, but I didn't. I am so grateful for this country we live in--for the freedom speak, carry arms, and to worship as we please. As a woman, I am grateful that I live in a country that allows me to vote, to get an education, and  to speak my mind. It's not like that in many countries. And maybe because I've been thinking about that, and about all the struggles we as women go through each and every day I decided to share these prints as part of my July freebies. I hope you believe in them as passionately as I do. And I hope if you know someone who needs to hear these things that you'll share them.
 To download the love yourself print, click HERE
To download the twig of faith print, click HERE

If you like these quotes, please visit my etsy shop and like peabeedesigns on facebook! It's something so small, but makes a small business owner so happy when we feel the love from you guys! 

Monday, June 3, 2013

Summertime & Simple Things (free printables!!)

For 9 months out of the year, I spend the majority of my days in a classroom with 12-13 year olds. I love my job, but come May and the countdown to summer I get giddy with excitement. I think working all those months makes summer all the sweeter for me. In our family, we enjoy having lots of BBQs in our backyard, spending time on the lake, and taking walks as a family in the evenings. We love family reunions and just soaking up the sun. I tried to capture the magic of summer and all those feelings in this subway art print. 
I purchased this frame and then rotate out the subway art prints as I change my seasonal decor. If you are looking for a great gift idea--giving someone a frame and subway art gift pack is a gift that will keep giving all year!
 To download the summer subway art print, click HERE

I thought this print went perfectly with my feelings on summer (and life in general). I'm a firm believer that it is the small, tiny moments that make up a wonderful life. You don't need grand gestures or the appearance of perfection to just enjoy yourself and appreciate what life has to offer. I hope we all remember this. Do you know someone who could use this quote? It prints in a variety of a sizes and is perfect as part of a card or a neighbor gift. 
To download the the little things print, click HERE

Please visit my etsy shop for more products available. Do you have a favorite quote you'd love to see printing and hanging in your home? I do custom orders! Send me a convo on etsy and let me create something custom just for you!