

PLEASE NOTE: I am not a professional seamstress. I make many, many mistakes and my goal of these tutorials to help you not make the same mistakes I did and to take those pinterest inspirations (i.e. usually no patterns and sometimes confusing tutorials) and turn them into something that anyone can do. There will probably be things that I do poorly or that you can do better. By all means DO! Improve upon this tutorial and make it your own. Enjoy the journey as you sew and improve. I know I am!
This year, I based my kids' costumes around a 2015 Christmas present my then 3 year old son got. His uncle gave him a really nice Batman costume. It was a little big on him and I knew right then and there that we'd use for Halloween in 2016. I just put him in some warm black pants and black thermal shirt underneath. And YAY--that's one costume down!

And if you have a Batman, you gotta have his trusty side-kick, right?

Fold your fabric in half (wrong sides out). I used an existing shirt to help me with the size I would need for a 24 month old old. Giving myself some extra room for seams, I very carefully cut through both pieces of fabric and cut out a rectangle a little larger than the size of the shirt.
With my two rectangles still lying on top of each other, I pinned where the neck and arm holes would be. Again, give yourself a little extra room.
When you're ready to sew, it will look like two rectangles pinned together. DO NOT sew your neck or arm hole openings closed or you'll be sad!
In year's past, I've done a casing around the bottom of the shirt and put an elastic in to make the costume for Olaf and the shark more bunchy and the appearance of being more round. I did not do that with this costume.
After I was done sewing, I used a sweater vest I found to help me shape the arm holes a little better than I've done before. I also took my sewing scissors and slightly rounded the neck opening on the front and back side of the shirt so my son's head could fit through!

Luckily, I had a top from a pair of TMNT jammies he could wear underneath the red shirt for the green sleeves of Robin's costume. But I needed to make a pair of plain green leggings. I scoured pinterest for tutorials and patterns and finally found this one that is seriously THE BEST one out there.


To do the skirt, I used this tutorial for the circle skirt. I was scared to do it and so worried it wasn't going to turn out, but it did! And now that I know how to make a circle skirt, I plan on making more skirts for my daughter to wear to school and church!
First, you need to make your own pattern by taping/gluing 4 pieces of paper together. Then you need to follow the instructions on the tutorial for figuring out the waist radius and the length. Here's another cheat sheet for figuring out the radius of your quarter circle.

Once I had the radius marked on my paper, I measured down to the length I wanted the skirt and marked it.


And TA-DA!!! You are practically finished!

I used this sparkly elastic stuff for the band. Again, I followed the instructions on the tutorial on how to sew it. The only difference was this gold stuff I used was way more stretchy than regular elastic so I had to cut, pin, and have my daughter try the skirt on many times before I got the right fit.


Since this material didn't fray when I cut it, I decided not to hem the bottom (it's a dress up skirt after all). So after sewing on the elastic waist, I was done!

It fit perfectly!


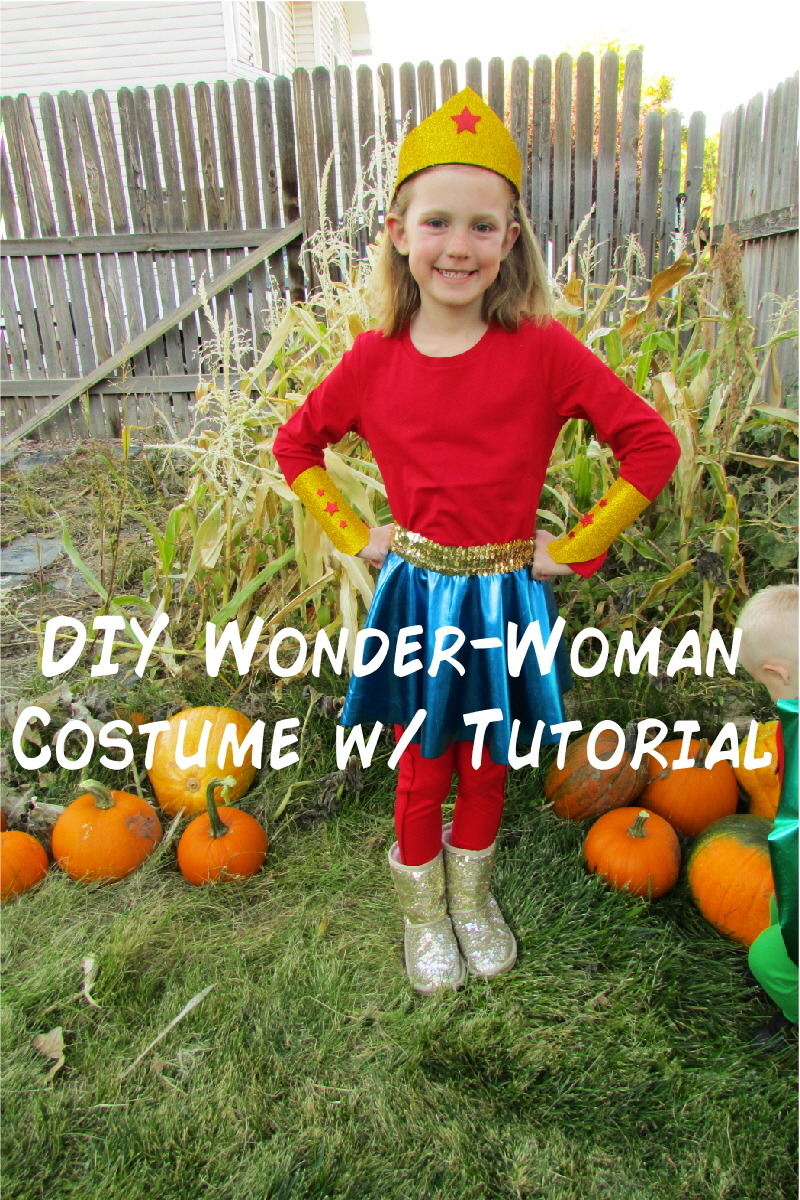
I found some glittery foam 8.5x11 sheets at Wal Mart that worked perfectly to make the crown and wrist cuffs Wonder Woman wears. They didn't have any glittery red foam, but Wal-Mart did carry a set of stickers already cut out into stars.
To make the crown, I first made a pattern on a sheet of white printer paper. WW's crown is pretty basic and not too hard to recreate. After I'd cut out my pattern, I cut out the crown on the gold foam paper. Then I just hot glued it to a headband my daughter already had. TIP: line up the center of the crown with the center of the headband and glue that part first.

I had enough of the foam paper left to do the wrist cuffs too. I just measured two pieces of the foam around my daughter's wrist so the two ends weren't quite touching. I cut one of each end so they were more tapered against her wrists (see pic below). Then I hot glued two small pieces of elastic (one at the top and bottom of each wrist cuff) so my daughter would be able to get the cuffs over her hand, but they'd still fit snuggly. Last, I attached the red stars to the crown and wrist cuffs, and I was done!


Check out the other past costume tutorials:
Jessie and Woody from Toy Story
Elsa and Olaf from Frozen