Showing posts with label Birthday. Show all posts
Friday, February 1, 2019
We're always HAIR for you! DIY Scrunchie tutorial and gift idea!
I serve in Young Women organization for my church and we try to recognize each girl on her birthday. Last year we did candy bars, but this year we wanted to do something different. Did you know that scrunchies are super popular among tweens/teens right now? I seriously couldn't believe it! I had TONS of scrunchies when I was a girl, so it's funny to me they are back in style. They are also SO EASY to make! The leaders got together to make a bunch for the girls and I designed the card to go with it.
Once the girls got wind we were giving out scrunchies for birthdays they begged us to do a scrunchie making activity! We had 4 sewing machines with leaders supervising each machine, but the girls did the sewing (even the youngest beehives with NO sewing experience). The great thing about scrunchies is that if you mess up, you can't tell because of how "scrunchie" the material is (see what I did there--haha!)
I would definitely recommend making a couple yourself before you teach your young women. I used two different tutorials to get the general idea before I set off making my own.
I used THIS ONE and also THIS ONE---they both pretty much say the same thing, I just needed some extra pictures to figure out how they were explaining how to sew your fabric tube together and hide your seam. Also...we figured out that if you cut your elastic a little bit longer you can just tie it in a knot and sew around the knot...it makes it really easy for the girls!
There are some really cute fabric patterns out there, so go crazy! We had enough scrap fabric as leaders that we didn't have to buy any for our activity. Another tip: pre-cut out the fabric. It saves so much time! I also pre-cut the elastic too.
Here's the birthday note! Just right click on the picture, save to your computer and print!
I have lots of other young women and primary digital files over on my ETSY SHOP...please check them out! And if you liked this post, please feel free to share! Likes, shares, and pins help my little shop stay in business! Thanks for stopping by!
Tuesday, March 13, 2018
Birthday on a Budget: Pizza-themed Party!
At our house it's tradition for my kids to only have a friend birthday party every other year. I love throwing my kids a party to celebrate their special day, but let's be honest: they can be exhausting and can get expensive if you're not careful.
When trying to pick a theme for my son's special day, I brainstormed things he was interested in and what would be fun for him and a few of his friend's to do at the party. My son has been more interested in helping me prepare and cook meals, so we decided on a pizza themed party!
Custom invitation made by peabeedesigns! Check out the shop and get your custom invite too!
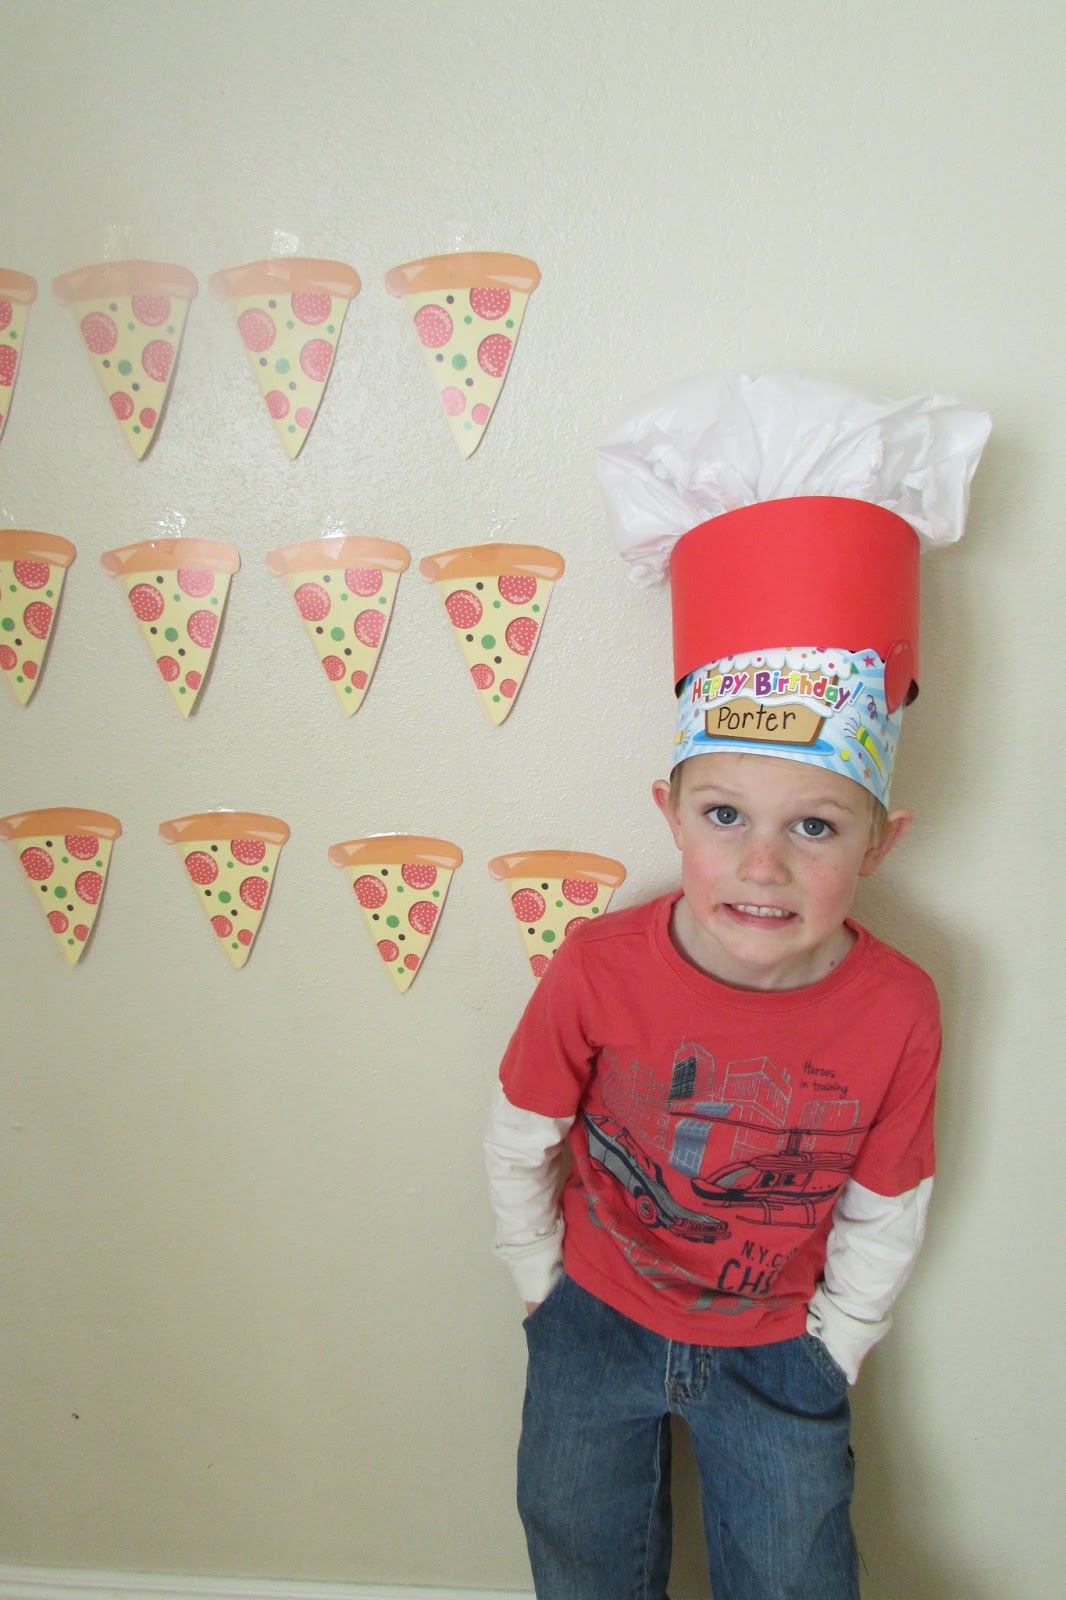
When the kids started to arrive, they immediately got to work making their chef's hat. The idea for the hat was adorable and easy to do. I used this tutorial from PBS kids . I found some food themed stickers and stamps at Wal-Mart in their party-favor section and the kids used those and some markers/crayons to decorate their hats.
Next, the kids made their own paper pizzas with toppings I'd cut out for them using cardstock and construction paper.
Then it was time to make their own pizzas to eat! I love this dough from our best bites. I made the dough ahead of time and had it rise before the party that way it would be ready right when we needed it. I used premade pizza sauce from a jar and had all the toppings ready to go. The kids were good about listening as I told them how to flatten their pizza, use a fork to poke holes in the dough, spread the sauce, sprinkle cheese and any toppings around. Then we put them in the oven to bake!
While they were baking, we played a "Pin the Pepperoni on the Pizza" game and opened presents. When the pizza was done, we ate and then decorated a circle-shaped sugar cookie (a pizza-cookie) and sang "Happy Birthday".
The party was easy and the kids had a blast making and eating their own pizzas. And I didn't spend a fortune on party supplies or favors for the kids to take home (they took home their hat and paper pizza they'd made and that was it!) Another win-win!
Check out Porter's Super-hero party on a budget!
Tuesday, May 9, 2017
DIY Gift Idea: Simple Sugar Scrub Recipe
It's that time of year again to recognize that special teacher in your child's life. I swear, now that I'm the parent instead of the teacher, the entire 9 month school year goes by faster than the 3 months of summer combined. Why is that? And how come pregnancy doesn't work like that too?
Last year, I did a free printable for teacher appreciation and I also shared some idea of things teachers REALLY want from students at the end of the school year. If you haven't already, I would definitely check that out!
This year, after racking my brain for something fun but still inexpensive, I found this super easy, all-natural recipe for a sugar scrub that I LOVED and decided to make some to give away to my kids' teachers. The recipe is sooooooooooo easy and is one you'll want to file away when you need a great gift for a friend (think Christmas and Birthdays!).
4 Ingredient Sugar Scrub:
Last year, I did a free printable for teacher appreciation and I also shared some idea of things teachers REALLY want from students at the end of the school year. If you haven't already, I would definitely check that out!
This year, after racking my brain for something fun but still inexpensive, I found this super easy, all-natural recipe for a sugar scrub that I LOVED and decided to make some to give away to my kids' teachers. The recipe is sooooooooooo easy and is one you'll want to file away when you need a great gift for a friend (think Christmas and Birthdays!).
| photo via |
4 Ingredient Sugar Scrub:
- 1/2 Cup Granulated Sugar
- 1/2 Cup Brown Sugar
- 2 Tablespoons Coconut Oil, melted
- 1 Tablespoon extract of your choice (think vanilla, almond, peppermint, raspberry, coconut...or a combination!)
Mix the ingredients well. You can mix by hand or I used my food processor to make sure everything was mixed really well.
Transfer mixture into an airtight container and it will keep for up to 2 weeks.
This scrub would be cute paired with a colorful nail file and bottle of nail-polish. Add in the printable gift tag below and you've got yourself an easy, inexpensive gift your child's teacher will love!
| photo via |
To download the toe-tally awesome teacher tag, click HERE
Don't forget to check out my shop to see if there's anything else the teacher in your life would love. And remember, I do custom orders too! Whether it's an invitation, announcement, or a custom print for your home, I do it all! Thanks for stopping by!
Wednesday, September 21, 2016
Confessions of a Wannabe Seamstress: 20 Min Table Runner
I have a new obsession: making table runners! I love that these are SO SIMPLE to make, can easily be done in 30 minutes or less, and are the perfect size! They're just big enough to be a focal point on your table, but not so huge that they take up your whole table when you want to use it: like homework time (you could even leave them on for dinner!)
Once a year our church does a huge craft/project day called "Super Saturday". All the women get together and spend the day rotating around stations set up for different projects. These table runners were one of the stations at this year's Super Saturday. My friend taught me how to make them, and she learned how to make them from her mom who learned how from a craft segment on a TV show.
My friend who was teaching had TONS of table runners she had made using this pattern. She had one for every holiday and we talked about how these would make cute christmas/birthday/housewarming gifts. Table runners are such a fun way to add a pop of color to your home and buying them at the store can get expensive. I'm so excited to make more for everyday use that I can rotate throughout the year.
Materials Needed:
After your fabric is trimmed, iron the creases.
Next, with the right sides of the fabric together, pin the left edges of your fabric together--along the length.
Using a 1/4 inch seam, sew a straight line along where you pinned.
Now pull the top piece over and pin the right side along the length. Sew that edge.
After it's sewed together, flip it right-side out. You'll have a long tube. Try to adjust the trim pieces so they're even on each side, then iron the creases. (Starch helps with getting your seams to look really nice)
Now fold your fabric in half lengthwise (or if you're my middle school student I would say "hot dog") so your top piece is facing out. Pin the open edges (along the width) together.
Using a 1/4 in seam (see NOTE) sew those pieces together on both ends.
NOTE:
When sewing this I always line up the "tag" ends on both pieces of fabric together. You'll need to sew a little further in than 1/4 inch. Then, once it's sewed, I'll trim off the excess pieces so my seam isn't so big underneath.
Once that's sewed it will look something like this:
Now just flip the end pieces inside out to make your points and iron your seams.
Last, use your machine or hand sew the buttons on your runner. Or if that's not your thing, you can always use a glue gun!
Once a year our church does a huge craft/project day called "Super Saturday". All the women get together and spend the day rotating around stations set up for different projects. These table runners were one of the stations at this year's Super Saturday. My friend taught me how to make them, and she learned how to make them from her mom who learned how from a craft segment on a TV show.
My friend who was teaching had TONS of table runners she had made using this pattern. She had one for every holiday and we talked about how these would make cute christmas/birthday/housewarming gifts. Table runners are such a fun way to add a pop of color to your home and buying them at the store can get expensive. I'm so excited to make more for everyday use that I can rotate throughout the year.
Materials Needed:
- 1/2 yard of fabric that will be your bottom and top trim
- 1/3 yard of fabric that will be the top pattern
- 2 buttons
After your fabric is trimmed, iron the creases.
Next, with the right sides of the fabric together, pin the left edges of your fabric together--along the length.
Using a 1/4 inch seam, sew a straight line along where you pinned.
Now pull the top piece over and pin the right side along the length. Sew that edge.
After it's sewed together, flip it right-side out. You'll have a long tube. Try to adjust the trim pieces so they're even on each side, then iron the creases. (Starch helps with getting your seams to look really nice)
Now fold your fabric in half lengthwise (or if you're my middle school student I would say "hot dog") so your top piece is facing out. Pin the open edges (along the width) together.
Using a 1/4 in seam (see NOTE) sew those pieces together on both ends.
NOTE:
When sewing this I always line up the "tag" ends on both pieces of fabric together. You'll need to sew a little further in than 1/4 inch. Then, once it's sewed, I'll trim off the excess pieces so my seam isn't so big underneath.
Once that's sewed it will look something like this:
Now just flip the end pieces inside out to make your points and iron your seams.
Last, use your machine or hand sew the buttons on your runner. Or if that's not your thing, you can always use a glue gun!
Enjoy your new table runner!
Seriously, these are so quick and easy you'll want to run out and get more fabric, so make sure to have plenty on hand!Saturday, February 6, 2016
How to Have a SUPER Party on a Budget
My son is obsessed with superheroes. He especially loves Spiderman but loves the other ones too. Knowing this, I set out to plan a SUPERHERO themed 4th birthday party for him and a few of his friends. And since I'm know I'm not the only one with kids who love superheroes, I'm going to tell you exactly what I did and how you can host a successful party for $30 or less!
This personalized invitation is customizable with several different superheroes to choose from and includes a matching topper for your party favor treats (see the picture at the end of this post). You can order your invitations HERE.
The spiderman tablecloth was the only superhero themed decoration I bought. (around $3) The rest of the decorations I got out of our tote I keep in storage that has crepe paper, the reusable Happy Birthday Banner, and the banner that is hung above the sliding glass doors.) You could easily print off more superhero pictures to add to existing decorations to match your theme.
My son invited a few of his little buddies over to our house for his first ever friend birthday party. He was so excited and thought everything was just wonderful and amazing. Makes you feel pretty good as a mom to see that kind of reaction.
When all the kids got to the party, I had them sit on a blanket laid out on the floor and we did a little story time. I read them 2 superhero books I found at our local library. They were super cute and geared toward younger kids. My son and his friends loved them! (cost of books: FREE from library)
Next, the boys played "Pin Spiderman in the Web". Instead of spending money on a premade game, I took 10 minutes (probably less) and made my own. I used a large piece of butcher-type paper from my kids' craft supplies and drew a web. Then I just googled spiderman and found an image I could print out for each guest on cardstock. We used one of my husband's ties as a blindfold. I didn't give a prize to the "winner". It was just a fun game we played. (cost of game: FREE)
Then I gathered the kids at the table where they made their own superhero mask and shield. I bought the mask set from Oriental Trading for $7.50 (I was able to score free shipping). For the shield I used some cheap paper plates and taped a strip of cardstock on the back to make a handle. The kids colored and decorated their own shield with markers and glued some shapes I had precut out (stars, lightning bolts etc..)
After the craft I let the boys play for a minute in this "obstacle course" I set up in our basement. (My son's birthday is in the middle of winter...for a summer bday an obstacle course outside would be really fun!) I needed a minute to clean up the table and the boys LOVED pretending to be superheroes with their new masks and shields.
Obstacle course aka: go down the slide, climb through the tunnel, climb over the ottoman, touch the wall, and then run back to the beginning. (Cost of obstacle course: FREE)
After the table was cleaned up I called the boys back up for cupcakes
I had a local bakery make the cupcakes. For a half dozen it was $3.50. I printed the superhero toppers from this site,taped them on toothpicks, and stuck them in the cupcakes myself. It's crazy how having the bakery add some kind of topper to your cake drastically increases the price.
Then it was present time!
And there you have it! We had one happy birthday boy at the end of the day!
Budget Breakdown:
- Colored Ink (I did have to buy a new ink cartridge but I'm not counting this as part of the party budget because it was something I would have bought for our family regardless and it's not like I used an entire cartridge for the party anyway)
- Pack of white card stock to print the invites (2 on a page) party favor toppers (3 on a page) and sheet of superhero cupcake toppers, and spiderman for game--this was less than $5 at WalMart and I have plenty of cardstock left over for other projects.
- Cupcakes--for a half dozen it was $3.50 at our local bakery. Obviously you could make them yourself for cheaper. Decorating the cupcakes could be one of your activities too! But for 4 year olds, I decided against it.
- Printable Invites and Party Favor Toppers--$10 for personalized invite and a personalized ThankYou favor topper found HERE
- Large bag of M&Ms for Thank You party favors -around $5
- Spiderman Tablecloth around $3
- Make your own superhero mask craft $7.50
- Pin Spiderman in his web, superhero shield craft, superhero books to read, obstacle course: FREE
Thursday, February 7, 2013
February Freebie is Here! 3 Printables!
February is my favorite month of the year. My son was born in February, it's also my birthday,Valentine's Day and spring is just around the corner. So many fun occasions jammed into this short month! This calls for some fun, new freebie printables.
First, I have seen these "I Love You Because" signs all over pinterest. Did you know that people actually charge money for these?! Now, you can print one here for free. Just print as an 8x10 or 5x7, and put inside a glass frame or even a sheet protector. Then, use a dry erase marker to finish the sentence. I think this is such a cute idea and a fun way to keep love alive all year.
To download the blank "I Love You Because" print, click HERE
If you are looking for a more traditional Valentine's print to use for a card or to display in your home, look no further! I love the look of holiday subway art printed as an 8x10 and displayed in a matted frame. It's the perfect accent to your other holiday decor. And this time of year, when outside is so gray and dreary, a splash of color to brighten up your home can do a world of good!
To download the Valentine's Subway art, click HERE
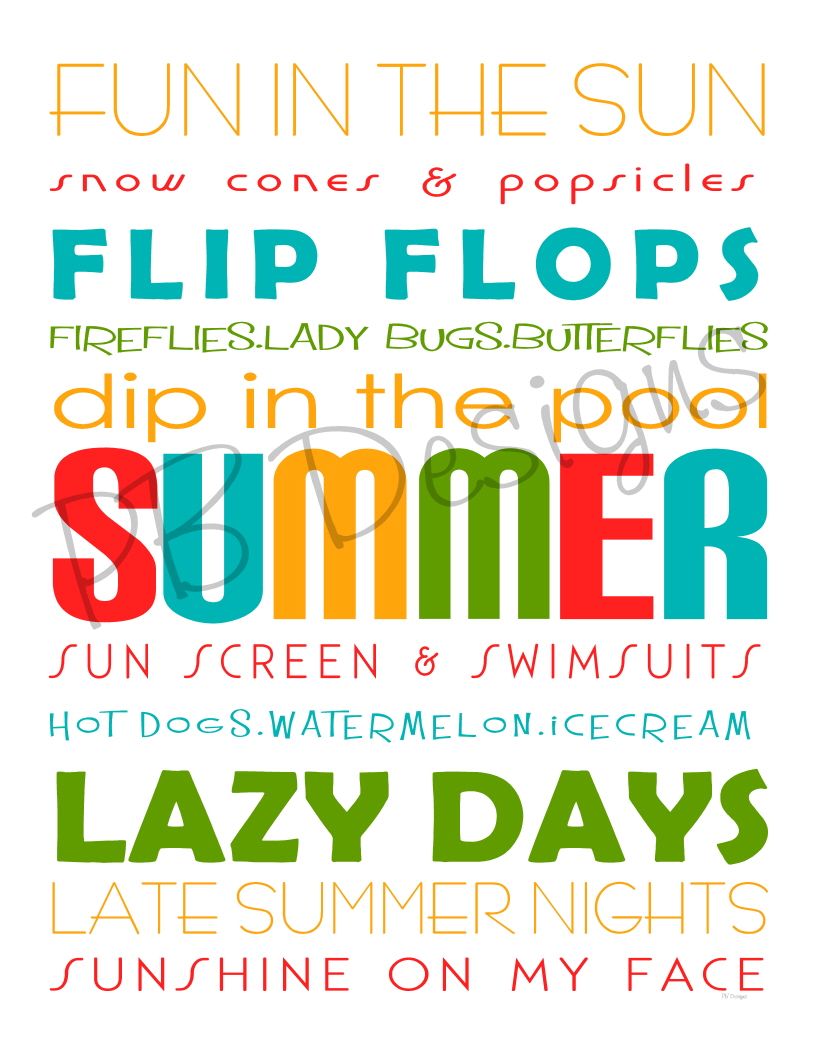
Finally, like I said earlier, my son's and my own birthday is in February, so to celebrate, here is another subway art print to display, or print to use as card for your own special occasion.
To download the Birthday Subway Art, click HERE
Remember, these printables, as with all other PeaBeeDesign products, these are meant for personal, noncommercial use only.
Be sure to check out my shop for more products!
Wednesday, May 9, 2012
Special Occassions
Looking for unique, personalized gifts? These are sure to please and be treasured forever. All prints comes in a high quality JPEG file that can be printed in a variety of sizes. They are perfect for framing or for printing on canvas.
Father's Day Subway Art Print: $7
Looking for a unique gift to honor your husband, father, or grandfather on their special day? This truly one of a kind subway art print is sure to please! Can be customized with names of family members, special dates or sayings. I can also change the color scheme and add a border, if desired.
Other Holiday Prints: $5
These fun prints add personality and style to your holiday decor. Print in a large size and frame for instant art, or print in smaller sizes to use for cards or gift tags. The possibilities are endless!
School Days Print: $5
Celebrate school in style! This fun, modern print will brighten up any classroom, preschool, or daycare. It would even look great in your home as part of your fall or back to school decor.
This would make a great teacher appreciate gift.
"Your Song" Customized Print
Looking for a unique wedding or anniversary gift? Relive the moments and emotions associated with "your song" on a daily basis with this fun wall print. Customize with your names, wedding date and the words to your song. The fonts and colors can be changed. I can also add a border if desired.
Important Dates:
Choose up to 10 important dates. The top 2 dates represent the couples birthdates, while the colored date represents a wedding date. Other dates could include first date, first kiss, engagement, and children's birthdays. What a special and fun way to remember the important dates in your life.
This print is available in 5 different fonts and 4 different colors. Mix and Match! Is also availabe with or without a border/ with or without the saying at the bottom. This would be a great birthday, anniversary, Christmas, Mother's Day, Father's day gift...or just because!
Mother's Subway Art print: $7
Celebrate your mother, grandmother, or great grandmother with this subway art style print. Choose your own words to describe her or use the ones in the sample. Add the names of children, grandchildren, special dates, or quotes that honor womanhood/motherhood for a truly unique gift.
Great for birthdays, Mother's Day, anniversaries, Christmas, or just because!
Baptism Subway Art Print: $5
This is a great reminder of your child's special day. Perfect as a gift for the special boy or girl from a friend or family member. This would also be a great gift from a primary presidency.
Personalized Baptism Subway Art Print: $7
Add a little something extra to remember their special day by adding the date and ward baptized and a picture of your child. Make this extra special by using a picture of your child in their baptism outfit!
Please contact Courtney at peabeedesigns@gmail.com for questions or to order.
Subscribe to:
Posts (Atom)